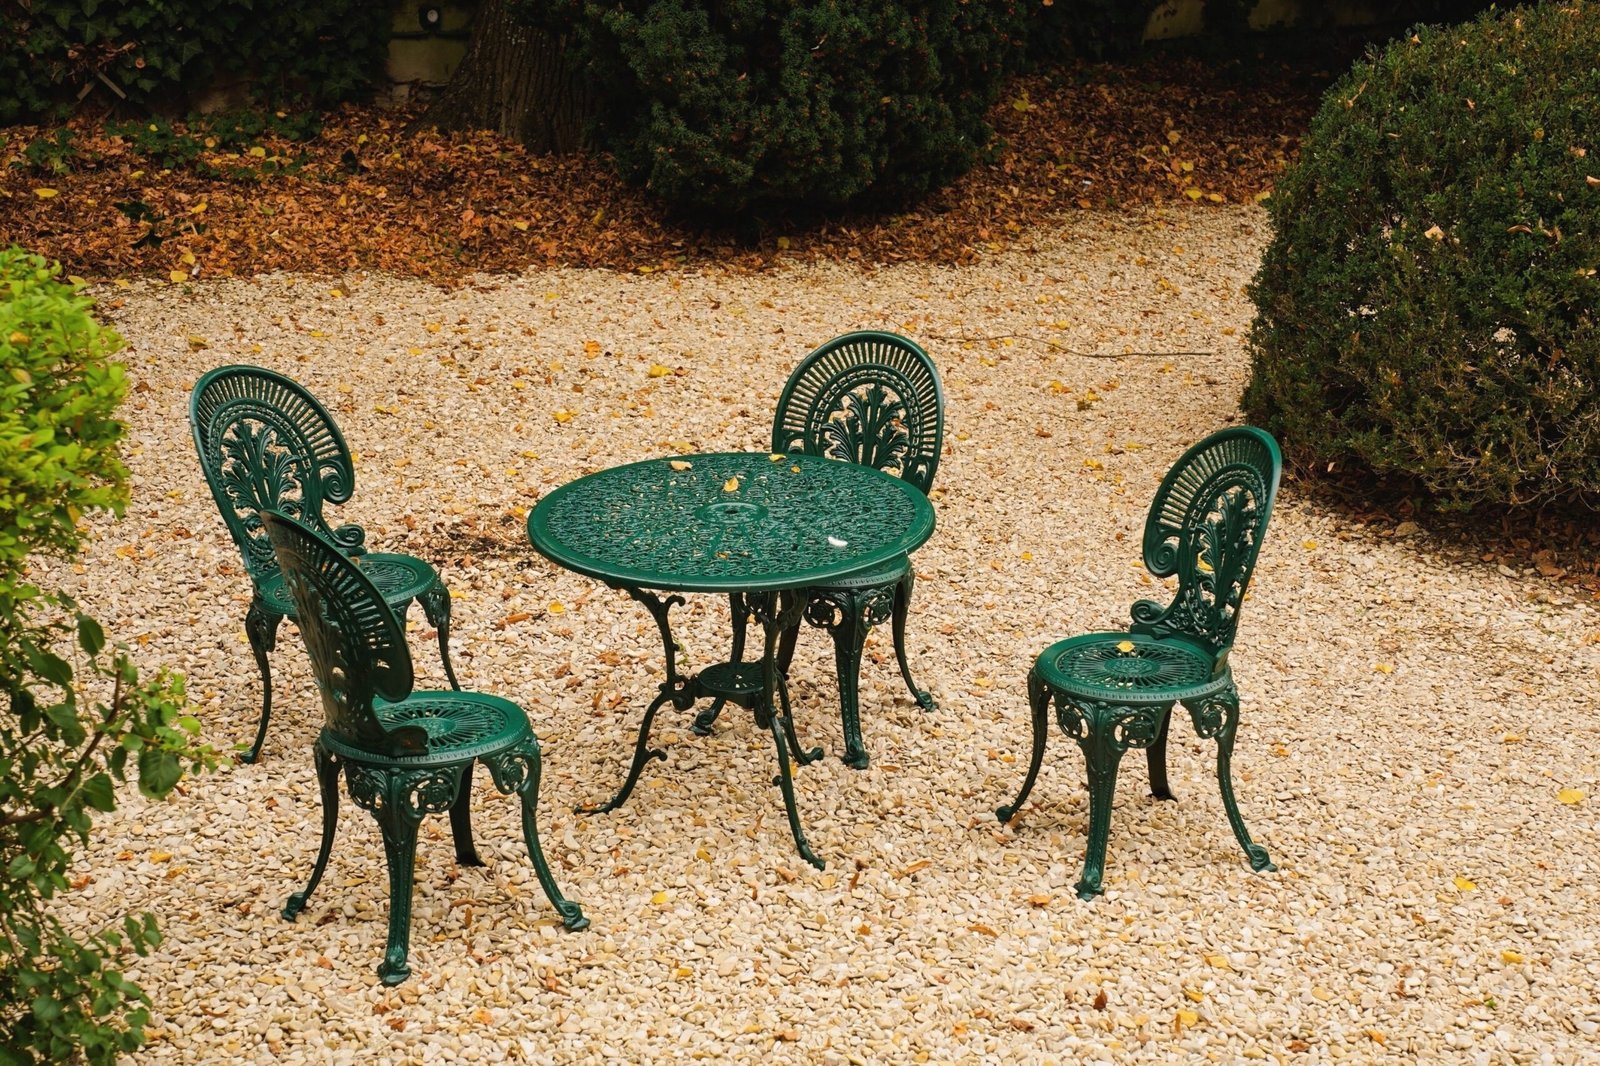
Pea Gravel Patio: How to Build One, What It Costs, and When It Works
A pea gravel patio is an outdoor seating area covered with small, smooth, round stones about the size of a pea. It is one of the cheapest and simplest patio surfaces you can build, and most homeowners can finish a small one in a weekend. If you want a casual place to sit outside without pouring concrete or laying pavers, it is a strong option.
It is not the right surface for every yard, though. Pea gravel shifts underfoot, so it suits relaxed seating areas far better than a main walkway or a spot that needs a firm, flat floor. It also needs solid edging to stay in place, and it is a poor choice for steep slopes and snowy regions. This guide covers what pea gravel is, what it costs, how to build one, and whether it fits your yard.
What Is a Pea Gravel Patio?

A pea gravel patio is a flat outdoor area surfaced with pea gravel instead of concrete, pavers, or wood decking. Pea gravel is natural stone smoothed by water over time, giving each piece its rounded shape and soft feel. Most patio pea gravel measures about 1/4 inch to 3/8 inch across, roughly the size of a garden pea.
The stones come in natural shades of tan, gray, white, brown, and reddish-brown. Because they are loose, the surface has a relaxed, natural look that suits cottage gardens, Mediterranean-style yards, and rustic outdoor rooms. Rainwater passes straight through the gaps between the stones instead of pooling on top.
A pea gravel patio is not just stones dumped on grass. A patio that lasts has layers underneath: a compacted base of crushed stone, landscape fabric, and edging around the border. Skipping those layers is the most common reason a gravel patio turns into a muddy, weedy mess within a year. To see how gravel fits into the wider world of stone and paved areas, read our guide to what is hardscaping.
Pea Gravel Patio Pros and Cons
Weigh what pea gravel does well against what it cannot do. The drawbacks are why some homeowners regret the choice.
Pros
Low cost. Bulk pea gravel typically costs about $30 to $55 per ton, or roughly $40 to $55 per cubic yard. A do-it-yourself install usually lands around $0.75 to $1.50 per square foot in materials, while a professional install often runs $2 to $4 per square foot. Compare that with concrete at roughly $8 to $12 per square foot installed, or natural stone at $15 to $25, and the savings are easy to see.
Excellent drainage. Rainwater passes through the stone layer and into the base below instead of pooling on top or running off toward your house, which makes it a good choice for yards with drainage problems.
Easy to install and change. You do not need to mix concrete, set mortar, or wait for anything to cure. The gravel levels itself when raked, and small mistakes are easy to fix by moving stone around. You can extend it later by pulling back the edging, and removing it is far easier than removing a slab.
Cons
Stones move. Pea gravel is loose and will migrate. Foot traffic, rain, pets, and children push stones past the edge, and without strong edging you will find gravel in your lawn and planting beds within weeks.
Furniture can wobble. Chairs and tables with narrow legs sink or lean on a loose surface, and a dining table that feels solid on concrete may rock on gravel unless you set wide feet, flat pavers, or a stabilizing grid under the legs.
Not comfortable barefoot for everyone. The smooth stones are gentler than crushed rock, but the surface is still uneven and shifting. Many people find it uncomfortable without shoes, and it is hard on high heels.
Hard for wheels and snow. Wheelchairs, strollers, and rolling carts struggle on loose gravel, so it is usually the wrong choice where a mobility device is used. A shovel also picks up gravel with snow, scattering stone and damaging the surface.
Needs regular raking. The surface thins out in busy spots and piles up in others, so a quick rake every few weeks and a fresh top-up every couple of years keeps it level.
How Much Does a Pea Gravel Patio Cost?
The cost depends on the patio size, how deep you lay the stone, and whether you hire help or do the work yourself. The stone itself is the small part of the bill: edging, fabric, and the crushed-stone base usually cost as much as the gravel, and delivery adds to the total.
Here is a worked example for a common size: a 12-by-12-foot patio, covering 144 square feet — enough for four chairs and a small table. The numbers below are estimates based on typical US supplier prices, and they will vary by region and supplier.
| Item | Amount needed | Estimated cost |
|---|---|---|
| Crushed stone base | About 1.3 cubic yards | $60 to $90 |
| Landscape fabric | 144 square feet | $45 to $75 |
| Pea gravel | About 1.3 cubic yards | $55 to $75 |
| Edging, steel or timber | About 48 linear feet | $50 to $145 |
| Delivery fee | One bulk delivery | $50 to $150 |
| Total, do-it-yourself | About $260 to $535 |
That is roughly $2 to $4 per square foot for a do-it-yourself patio of this size, with delivery included. A smaller 10-by-10-foot patio often costs $200 to $400 in materials.
Buying in bulk is much cheaper than buying bags. Bagged pea gravel costs about $4 to $8 per half-cubic-foot bag, which adds up fast: a 12-by-12 patio would need more than 70 bags. A professional install adds labor, with landscapers in many US markets quoting $2 to $4 per square foot. Get two written estimates and ask exactly what is included.
Pea Gravel vs. Other Patio Surfaces
| Surface | Cost per sq. ft. | Drainage | Comfort | Maintenance |
|---|---|---|---|---|
| Pea gravel | $2 to $5 | Excellent | Uneven, shifting | Raking, top-ups |
| Concrete pavers | $15 to $20 | Fair unless permeable | Firm, flat | Weed control in joints |
| Poured concrete | $8 to $12 | Poor, sheds water | Firm, flat | Crack repair, sealing |
| Crushed stone | $3 to $6 | Very good | Rougher, angular | Raking, top-ups |
Pea gravel wins on cost and drainage. Pavers and concrete win on stability, furniture support, and accessibility. Crushed stone is the closest rival: it costs about the same, drains almost as well, and locks together better, though it feels rougher under bare feet.
Choose pea gravel for a casual seating area, a fire pit zone, or a low-cost patio in a yard with drainage issues. Choose pavers or concrete if you need a firm floor for a dining table, a grill station, or anyone using a wheelchair or stroller. For more ideas, see our collection of hardscape ideas.
How to Build a Pea Gravel Patio
Building a pea gravel patio is a manageable weekend project for most homeowners. The steps below follow the layered method used by professional landscapers, shown in This Old House’s DIY pea gravel patio guide.
Before you dig, call 811, the national call-before-you-dig number, at least a few days ahead. The service is free, and it marks underground utility lines so you do not cut a gas, water, or electric line. Digging without it can be dangerous and expensive, and in many states it is required by law.
Step 1: Mark and measure the area
A 10-by-10-foot patio fits two chairs and a small table; a 12-by-16-foot patio fits a dining set for six. Mark the outline with spray paint, stakes, and string, then walk it and sit in the space. Is it big enough, close to the back door, and sunny when you will use it most?
Step 2: Excavate 4 to 5 inches deep
Remove the grass and topsoil inside the marked area to a depth of about 4 to 5 inches, leaving room for a 2-inch base layer and 2 to 3 inches of pea gravel on top. Remove rocks and roots, and keep the bottom as level as you can. Slope the base slightly away from your house, about 1/4 inch per foot, so rainwater drains away from the foundation.
Step 3: Compact the soil and add the base
Tamp the exposed soil with a hand tamper or a rented plate compactor. Then spread 2 to 3 inches of 3/4-inch crushed stone over it, rake it level, wet it lightly, and compact it again. This base gives the patio its stability: pea gravel alone would sink into soft soil, while crushed stone locks together and spreads the weight of furniture and feet.
Step 4: Lay landscape fabric and install edging
Roll landscape fabric over the compacted base, overlapping the seams by a few inches. It stops weeds from growing up through the gravel and keeps the pea gravel from sinking into the base. Use fabric made for landscaping, not thin plastic sheeting, which blocks water and creates puddles.
Install edging around the full perimeter before you add the gravel. Steel edging, pressure-treated timber, brick, or concrete pavers all work. Sink it so its top sits about 1/2 inch above the finished gravel level, which keeps the stones from wandering into the lawn, so anchor it firmly.
Step 5: Spread the pea gravel and finish
Shovel the pea gravel in loads, spreading each load with a rake before adding more. Aim for a finished depth of 2 to 3 inches over the fabric. Two inches is enough for seating; three inches looks fuller but shifts more underfoot. Rake the surface level and check it with a long straight board.
Rake it again and wet it down lightly to help it settle. Do not over-compact it, since the gravel must stay a little loose so rainwater can pass through. Wait a day, then place your furniture, setting wide feet or flat pavers under chair and table legs to stop them sinking. If your patio sits beside the house under a roof overhang, see our ideas for a covered patio attached to house.
Design Ideas That Make Pea Gravel Look Finished

A plain rectangle of gravel can look unfinished. A few design choices make it feel planned.
Add stepping stones. Set large flat stones or concrete pavers into the gravel as a walkway from the back door to the seating area. They give you a stable path for carrying food and drinks and break up the flat expanse of gravel. Better Homes & Gardens shows this idea in its gravel patio design ideas.
Build around a fire pit. Pea gravel is non-combustible, so it is a natural choice under and around a fire pit. A circular gravel area with a ring of chairs feels like a destination. Keep the fire pit on a stable base, follow local fire rules, and keep chairs at a safe distance.
Mix in plants, containers, and a rug. Soft planting around the edge makes the stone feel intentional. Ornamental grasses, lavender, and low shrubs spill over the edging and soften the border, while large pots add height and color without a garden bed. For planting ideas that pair well with gravel, our low maintenance landscaping ideas focus on plants that need little watering or pruning. A weather-resistant outdoor rug over the center defines the seating area and covers the loose surface underfoot.
Work with small spaces. Pea gravel follows any outline, so a narrow side yard or a curved corner can become usable where pavers or concrete would cost too much. For tight plots, our small backyard ideas show how a compact patio can hold seating, plants, and a path.
Common Mistakes to Avoid
Skipping the base layer. Pouring pea gravel straight onto dirt is the single most common mistake. The stones sink into mud after the first heavy rain, and weeds push straight through. Always lay a compacted crushed-stone base and landscape fabric first.
Building on a slope or against the house without drainage. Pea gravel slides downhill in heavy rain, so terrace a sloped area with a low retaining edge or choose a different surface. Beside the house, slope the base away from the wall and keep the finished gravel a few inches below the door threshold. If you are unsure about drainage near your foundation, hire a qualified professional before you build.
How to Maintain a Pea Gravel Patio
A pea gravel patio needs less upkeep than a lawn or a deck, but it is not maintenance-free. Rake the surface every few weeks to level thin and high spots. Pull weeds while they are small, since they come out easily from loose gravel. Hose it down once or twice a season, top up thin areas with a bag or two of matching gravel every year or two, and check the edging each spring.
Leaves are the main nuisance in fall. A leaf blower on a low setting clears them without scattering much stone. Avoid a metal snow shovel in winter; use a plastic one and skim the top, or leave a thin layer to melt. Sweep stray stones back onto the patio, since stones in the lawn can damage a mower blade. For a full plan of the surrounding yard, our guide to outdoor living space ideas shows how a gravel patio can sit alongside lawn, planting, and paths.
💡 Practical Home Tip: Before you order a full truckload, buy one bag of pea gravel and scatter it in a small test patch where your patio will go. Walk on it barefoot and in shoes, set a chair on it, and look at the color in morning and evening light. A ten-minute test tells you more about comfort and color than any photo can.
Frequently Asked Questions
Is pea gravel good for patios?
Yes, for casual seating and dining areas. It is affordable, drains well, and is easy to install. It is less suitable for a main walkway, a table that needs a level floor, or a household where someone uses a wheelchair or stroller.
How deep should a pea gravel patio be?
Aim for 2 to 3 inches of pea gravel over a 2- to 3-inch compacted base, inside a hole about 4 to 5 inches deep. Two inches is enough for seating; three inches looks fuller but shifts more.
How much pea gravel do I need?
One cubic yard covers about 100 square feet at 3 inches deep, or about 150 square feet at 2 inches deep. For a 10-by-10-foot patio at 3 inches deep, order about one cubic yard; for a 12-by-12-foot patio, about one and a half. Order 10 percent extra for spillage and settling.
Do I need landscape fabric under pea gravel?
Yes. It cuts weed growth sharply and keeps the pea gravel from sinking into the base or the soil. Use a fabric made for landscaping, not plastic sheeting, so water can drain through.
Choosing Your Patio
A pea gravel patio is a simple trade. You give up the firm, flat floor of concrete or pavers, and in return you get a patio that costs a fraction of the price, drains rainwater instead of shedding it, and can be built in a weekend with basic tools. For a relaxed seating area, a fire pit zone, or a small yard, that trade is worth it.
Start small if you are unsure. Mark out the area, test the stone underfoot, and build the base properly. The base and the edging are what separate a patio that lasts for years from a patch of stones that drifts into the lawn by midsummer. If it becomes your favorite spot, you can extend it later, one section at a time. For more ways to use gravel in tight or awkward parts of your yard, see our side yard ideas, and for seating and shade ideas around a gravel surface, browse our back porch ideas.
Disclaimer: Homes, yards, budgets, and soil conditions vary, so treat the costs and steps in this guide as general information rather than a fixed plan for your property. If your patio sits near a foundation, on a slope, or over utility lines, hire a qualified professional for the drainage and excavation work before you start.